LXD is a powerful system container and virtual machine manager designed to simplify Linux container management. Whether you’re hosting web applications, testing environments, or deploying microservices, LXD provides a lightweight and efficient alternative to traditional virtualization tools.
In this article, we’ll walk you through a step-by-step demo of using LXD to install and manage a container for a common scenario. Additionally, we’ll include a summarized cheat sheet in table format to help you quickly reference LXD commands.
What is LXD?
LXD is an open-source container management tool built on top of Linux Containers (LXC). It offers system containers that behave like virtual machines but are faster and more lightweight. With LXD, you can:
- Run full Linux distributions inside containers.
- Use advanced networking and storage features.
- Manage containers remotely via REST API.
- Migrate containers between hosts with minimal downtime.
Installing LXD Using Snap
The recommended way to install LXD on modern Ubuntu systems is via Snap. Follow these steps:
1. Install Snapd
Ensure Snap is installed on your system. If Snap is not installed, run:
sudo apt update
sudo apt install snapd
2. Install LXD
Install LXD using Snap:
sudo snap install lxd

3. Verify Installation
Check the installed version of LXD:
lxd --version

Demo: Using LXD to Install a Container
Let’s walk through a common scenario where we use LXD to create and manage a container running Ubuntu 22.04.
Step 1: Initialize LXD
Run the following command to initialize LXD:
sudo lxd init
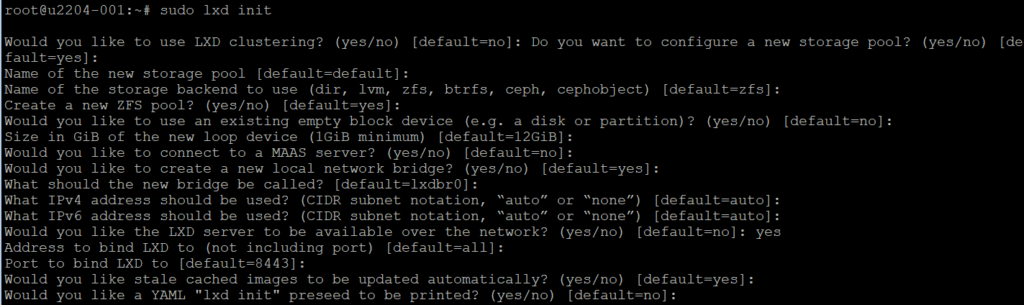
You will be prompted to configure storage, networking, and other settings. For simplicity, you can choose the default options.
Step 2: Launch an Ubuntu Container
Create and start a container running Ubuntu 22.04 with the command:
lxc launch ubuntu:22.04 web-server

This command creates a container named web-server using the Ubuntu 22.04 image.
Step 3: Access the Container
Get shell access to the container:
lxc exec web-server -- bash

You are now inside the container and can install packages or configure services. For example, install Apache:
apt update
apt install apache2 -y
Start the Apache service:
systemctl start apache2
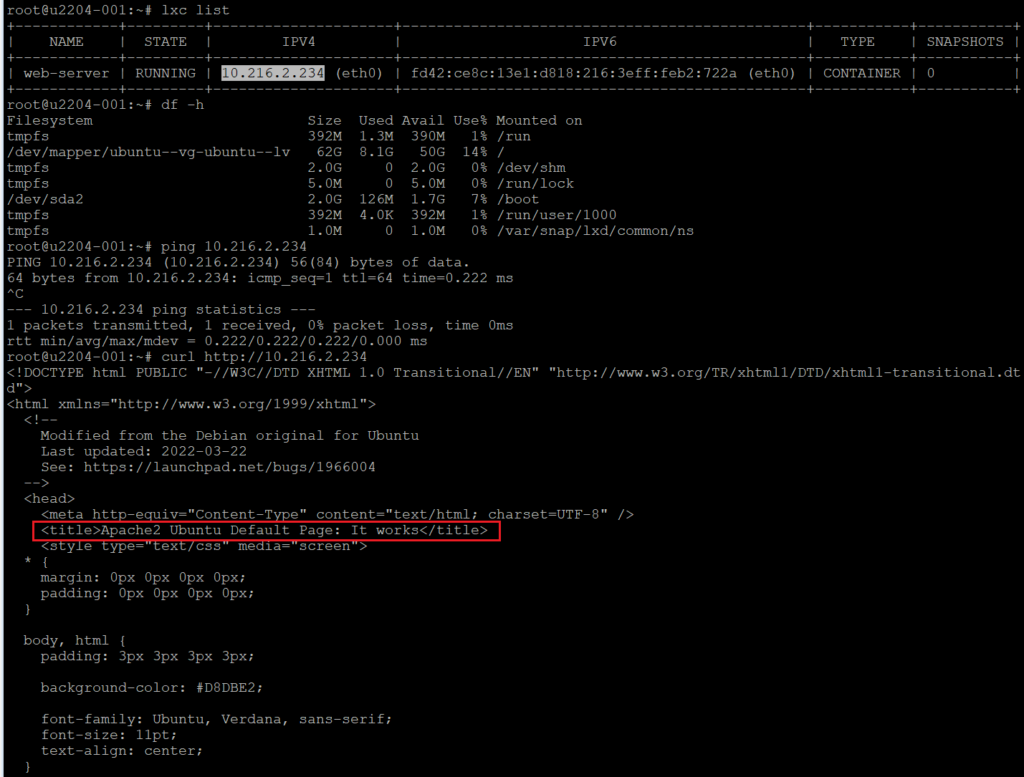
Step 4: Verify Container Networking
Exit the container and check its IP address:
lxc list

Access the container’s web server by visiting its IP address in a browser or using curl http://ip to check the connectivity.
Step 5: Stop and Delete the Container
When you no longer need the container, stop it:
lxc stop web-server
Delete the container:
lxc delete web-server
LXD Command line Cheat Sheet
Below is a summarized cheat sheet for commonly used LXD commands:
| Category | Command | Description |
|---|---|---|
| Initialization | lxd init | Initializes LXD before first use. |
| Create Instances | lxc init <image> <name> | Creates a container without starting it. |
lxc launch <image> <name> | Creates and starts a container. | |
lxc launch <image> <name> --vm | Creates and starts a virtual machine. | |
| Manage Instances | lxc list | Lists all instances. |
lxc info <instance> | Displays information about an instance. | |
lxc start <instance> | Starts an instance. | |
lxc stop <instance> [--force] | Stops an instance. | |
| `lxc delete <instance> [–force | –interactive]` | |
| Access Instances | lxc exec <instance> -- <command> | Runs a command inside an instance. |
lxc exec <instance> -- bash | Gets shell access to an instance. | |
lxc console <instance> | Gets console access to an instance. | |
| File Management | lxc file pull <instance>/<path> <local_path> | Pulls a file from an instance. |
lxc file push <local_path> <instance>/<path> | Pushes a file to an instance. | |
| Projects | lxc project create <project> | Creates a project. |
lxc project set <project> <option> | Configures a project. | |
lxc project switch <project> | Switches to a project. |
Conclusion
LXD simplifies container management, making it an excellent choice for developers, system administrators, and DevOps engineers. With its lightweight performance and VM-like capabilities, LXD is ideal for hosting applications, testing environments, and more.
In this article, we demonstrated how to use LXD to install and manage a container for a common scenario. Additionally, the cheat sheet provides a quick reference for essential LXD commands.
Next Topic:
In next article we will talk about how to use podman on ubuntu server. Stay tuned.