Containerization has transformed application deployment by packaging software into isolated, lightweight environments that ensure consistency across different systems. Docker on Ubuntu Server is a powerful combination that simplifies this process, enabling developers and system administrators to build, ship, and run applications seamlessly. As the industry-leading containerization platform, Docker streamlines workflows and enhances scalability for modern application development.
In this guide, we’ll walk you through the steps to install Docker on Ubuntu Server and run your first containerized application. Whether you’re new to Docker or looking to optimize your deployment process, this tutorial will help you get started with containerization on Ubuntu Server.
Previous articles:
01. Introduction to Ubuntu Server – SysOSX: AI & Cloud
02. How to Setup Your First Ubuntu Server: A Beginner’s Guide – SysOSX: AI & Cloud
03.Mastering the Linux Command Line for Ubuntu Server – SysOSX: AI & Cloud
04. Managing Users and Permissions on Ubuntu Server: A Comprehensive Guide – SysOSX: AI & Cloud
05. Networking Basics for Ubuntu Server: A Comprehensive Guide – SysOSX: AI & Cloud
06. Installing and Managing Software on Ubuntu Server: A Complete Guide – SysOSX: AI & Cloud
07.Patching and Updating Ubuntu Server: A Comprehensive Guide – SysOSX: AI & Cloud
08. Securing Your Ubuntu Server: Practical Steps for Hardening and Protection – SysOSX: AI & Cloud
09. Ubuntu server auditing and logging
10. System Monitoring Tools for Ubuntu Server: A Comprehensive Guide – SysOSX: AI & Cloud
11. Centralized Logging for ubuntu server: a must read guide – SysOSX: AI & Cloud
12. Audit and Compliance for Ubuntu Server: Best Practices – SysOSX: AI & Cloud
14. Host Multiple Websites on a single Ubuntu Server: Useful tips – SysOSX: AI & Cloud
15. Managing Storage and Disks on Ubuntu Server: Simple Guide – SysOSX: AI & Cloud
16. Setting Up File Sharing Services on Ubuntu Server: a complete guide – SysOSX: AI & Cloud
17. Setting Up a Secure Database Server on Ubuntu: MySQL vs. MariaDB – SysOSX: AI & Cloud
18. How to Configure and Use LVM on Ubuntu Server: A Comprehensive Guide – SysOSX: AI & Cloud
Table of Contents
Prerequisites
Before installing Docker, ensure your Ubuntu Server meets these requirements:
- Ubuntu 20.04 LTS or later (64-bit).
- sudo privileges or root access.
- Stable internet connection for downloading packages.
Step 1: Install Docker on Ubuntu Server
Update System Packages
sudo apt update && sudo apt upgrade -y
Install Required Dependencies
sudo apt install apt-transport-https ca-certificates curl software-properties-common -y
Add Docker’s Official GPG Key
curl -fsSL https://download.docker.com/linux/ubuntu/gpg | sudo gpg --dearmor -o /usr/share/keyrings/docker-archive-keyring.gpg
Set Up Docker Repository
echo "deb [arch=$(dpkg --print-architecture) signed-by=/usr/share/keyrings/docker-archive-keyring.gpg] https://download.docker.com/linux/ubuntu $(lsb_release -cs) stable" | sudo tee /etc/apt/sources.list.d/docker.list > /dev/null
Install Docker Engine
sudo apt update
sudo apt install docker-ce docker-ce-cli containerd.io -y
Verify Installation
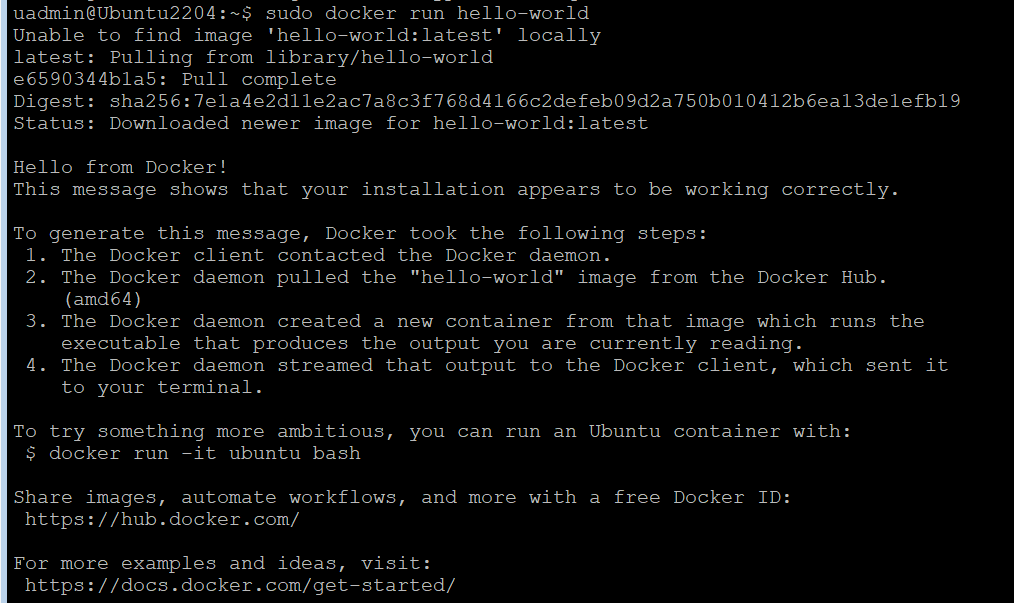
sudo docker run hello-world
If successful, you’ll see a confirmation message like below.
Step 2: Managing Docker as a Non-Root User
By default, Docker requires sudo privileges. To avoid typing sudo repeatedly:
- Create a Docker Group (if not exists):
sudo groupadd docker - Add Your User to the Group:
sudo usermod -aG docker $USER - Apply Changes:
newgrp docker
Step 3: Running Your First Container
Launch a Nginx web server in seconds:
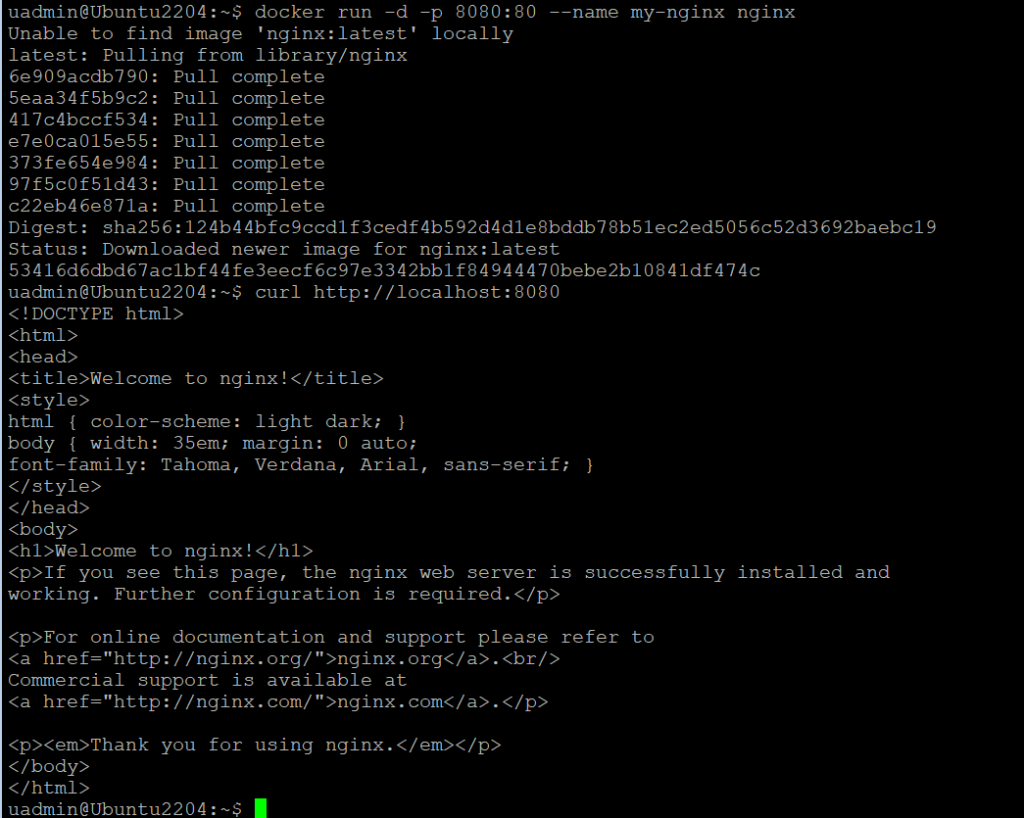
docker run -d -p 8080:80 --name my-nginx nginx
-d: Run in detached mode.-p 8080:80: Map host port 8080 to container port 80.--name: Assign a custom name to the container.
Verify Access:
curl http://localhost:8080
Step 4: Essential Docker Commands
| Command | Description |
|---|---|
docker ps | List running containers |
docker images | View downloaded images |
docker stop <container-id> | Stop a container |
docker rm <container-id> | Remove a container |
docker rmi <image-id> | Delete an image |
Step 5: Automate Workflows with Docker Compose
For multi-container applications, use Docker Compose:
- Install Docker Compose:
sudo apt install docker-compose -y
- Create a
docker-compose.ymlFile:
version: '3'
services:
  web:
    image: nginx
    ports:
      - "8080:80"
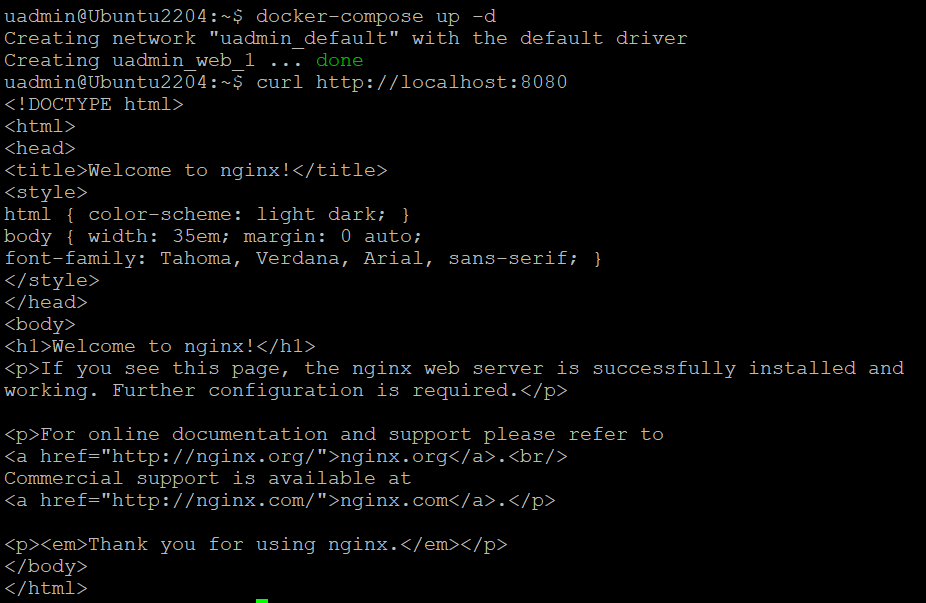
- Start the Stack:
docker-compose up -d
Best Practices for Docker on Ubuntu
- Regularly Update Docker:
sudo apt update && sudo apt upgrade docker-ce -y
- Clean Unused Resources:
docker system prune -a
- Use Official Images from Docker Hub for security and reliability.
Troubleshooting Common Issues
- Permission Denied: Ensure your user is in the
dockergroup. - Port Conflicts: Check for other services using the same port.
- Image Pull Errors: Verify internet connectivity and image name spelling.
Docker vs. Other Containerization Tools
While Docker dominates the containerization landscape, understanding alternatives helps choose the right tool for your use case:
| Tool | Type | Key Features | Best For |
|---|---|---|---|
| Docker | Application Containers | – Focus on portable, app-centric packaging<br>- Huge ecosystem (Docker Hub)<br>- Simple CLI and Compose | Developers, microservices, CI/CD workflows |
| LXD | System Containers | – Full OS environments (like lightweight VMs)<br>- Tight integration with LXC/Linux<br>- Advanced resource management | Infrastructure-as-a-service, hypervisor replacement |
| Podman | Application Containers | – Daemonless architecture<br>- Rootless by default<br>- Docker-compatible CLI | Security-focused workloads, edge computing |
| containerd | Container Runtime | – Low-level runtime (used by Docker/Kubernetes)<br>- Minimalist design<br>- Focus on scalability | Kubernetes clusters, large-scale deployments |
| CRI-O | Kubernetes Runtime | – Optimized for Kubernetes CRI<br>- Lightweight & secure<br>- Red Hat-backed | OpenShift/OKD clusters, Kubernetes-native ops |
Why Docker Still Shines
- Beginner-friendly: Simplified workflow for app development and testing.
- Portability: Containers run identically across macOS, Windows, and Linux.
- Community support: Over 8 million Docker Hub images and extensive documentation.
When to Consider Alternatives
- LXD: Need full OS isolation (e.g., hosting multiple services with separate users).
- Podman: Prioritize security (e.g., government/healthcare workloads).
- containerd/CRI-O: Building Kubernetes-native infrastructure.
Conclusion
By following this guide, you’ve installed Docker on Ubuntu Server and deployed your first containerized application. Docker’s flexibility makes it indispensable for DevOps, cloud-native development, and hybrid environments. Explore advanced features like Docker Swarm or Kubernetes integration to scale your container workloads.
Reference: Docker Official Documentation
What’s Next? Get Ready to Explore LXD for Linux Containers
Now that you’ve mastered Docker for application containerization, let’s dive deeper into the world of Linux system containers! Stay tuned for our upcoming guide:
2 thoughts on “20. How to Install Docker on Ubuntu Server: A Step-by-Step Guide to Containerization”