
Introduction
Host multiple websites on a single Ubuntu server is a cost-effective solution for developers, small businesses, and hobbyists. This guide will walk you through setting up virtual hosts in Apache and Nginx to host multiple websites on the same server. By the end of this tutorial, you’ll be able to configure your server to handle multiple domains or subdomains efficiently.
Previous articles:
01. Introduction to Ubuntu Server – SysOSX: AI & Cloud
02. How to Setup Your First Ubuntu Server: A Beginner’s Guide – SysOSX: AI & Cloud
03.Mastering the Linux Command Line for Ubuntu Server – SysOSX: AI & Cloud
04. Managing Users and Permissions on Ubuntu Server: A Comprehensive Guide – SysOSX: AI & Cloud
05. Networking Basics for Ubuntu Server: A Comprehensive Guide – SysOSX: AI & Cloud
06. Installing and Managing Software on Ubuntu Server: A Complete Guide – SysOSX: AI & Cloud
07.Patching and Updating Ubuntu Server: A Comprehensive Guide – SysOSX: AI & Cloud
08. Securing Your Ubuntu Server: Practical Steps for Hardening and Protection – SysOSX: AI & Cloud
09. Ubuntu server auditing and logging
10. System Monitoring Tools for Ubuntu Server: A Comprehensive Guide – SysOSX: AI & Cloud
11. Centralized Logging for ubuntu server: a must read guide – SysOSX: AI & Cloud
12. Audit and Compliance for Ubuntu Server: Best Practices – SysOSX: AI & Cloud
Table of Contents
- Part 1: Hosting Multiple Websites with Apache
- Part 2: Hosting Multiple Websites with Nginx
Prerequisites
To follow this guide, ensure you have:
- An Ubuntu Server (version 20.04 or later is recommended).
- A user account with
sudoprivileges. - Multiple domain names pointing to your server’s IP address.
- Basic knowledge of Linux commands.
Part 1: Hosting Multiple Websites with Apache
Step 1: Install Apache Web Server
If Apache isn’t already installed, run the following command:
sudo apt update && sudo apt install apache2 -y
Step 2: Set Up Virtual Hosts for Each Website
Apache uses virtual hosts to serve multiple websites from one server. Each website will have its own virtual host configuration file.
Create Directories for Websites
- Create separate directories for each website:
sudo mkdir -p /var/www/website1.com /var/www/website2.com
- Assign ownership of these directories to your user account:
sudo chown -R $USER:$USER /var/www/website1.com /var/www/website2.com
Create Virtual Host Configuration Files
- Create a configuration file for the first website:
sudo nano /etc/apache2/sites-available/website1.com.conf
- Add the following configuration:
<VirtualHost *:80>
    ServerName website1.com
    ServerAlias www.website1.com
    DocumentRoot /var/www/website1.com
    ErrorLog ${APACHE_LOG_DIR}/website1_error.log
    CustomLog ${APACHE_LOG_DIR}/website1_access.log combined
</VirtualHost>
- Create a configuration file for the second website:
sudo nano /etc/apache2/sites-available/website2.com.conf
- Add the following configuration:
<VirtualHost *:80>
    ServerName website2.com
    ServerAlias www.website2.com
    DocumentRoot /var/www/website2.com
    ErrorLog ${APACHE_LOG_DIR}/website2_error.log
    CustomLog ${APACHE_LOG_DIR}/website2_access.log combined
</VirtualHost>
Enable Virtual Hosts
- Enable the virtual host configurations:
sudo a2ensite website1.com.conf
sudo a2ensite website2.com.conf
- Reload Apache to apply the changes:
sudo systemctl reload apache2
Step 3: Test Apache Configuration
- Create a simple
index.htmlfile for each website:
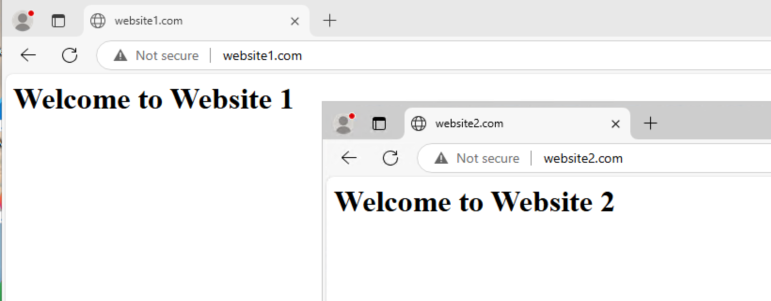
echo "<h1>Welcome to Website 1</h1>" > /var/www/website1.com/index.html
echo "<h1>Welcome to Website 2</h1>" > /var/www/website2.com/index.html
- Visit
http://website1.comandhttp://website2.comin your browser to verify the setup.
Step 4: Secure Websites with SSL/TLS
Install Certbot
Install Certbot with the Apache plugin:
sudo apt install certbot python3-certbot-apache -y
Obtain SSL Certificates
Run Certbot for each website:
sudo certbot --apache -d website1.com -d www.website1.com
sudo certbot --apache -d website2.com -d www.website2.com
Certbot will automatically configure SSL for both websites and redirect HTTP traffic to HTTPS.
Part 2: Hosting Multiple Websites with Nginx
Step 1: Install Nginx Web Server
If Nginx isn’t already installed, run:
sudo apt update && sudo apt install nginx -y
Step 2: Set Up Server Blocks for Each Website
Nginx uses server blocks (similar to virtual hosts in Apache) to serve multiple websites from one server.
Create Directories for Websites
- Create separate directories for each website:
sudo mkdir -p /var/www/website1.com /var/www/website2.com
- Assign ownership of these directories to your user account:
sudo chown -R $USER:$USER /var/www/website1.com /var/www/website2.com
Create Server Block Configuration Files
- Create a configuration file for the first website:
sudo nano /etc/nginx/sites-available/website1.com
- Add the following configuration:
server {
    listen 80;
    server_name website1.com www.website1.com;

    root /var/www/website1.com;
    index index.html;

    location / {
        try_files $uri $uri/ =404;
    }

    error_log /var/log/nginx/website1_error.log;
    access_log /var/log/nginx/website1_access.log;
}
- Create a configuration file for the second website:
sudo nano /etc/nginx/sites-available/website2.com
- Add the following configuration:
server {
    listen 80;
    server_name website2.com www.website2.com;

    root /var/www/website2.com;
    index index.html;

    location / {
        try_files $uri $uri/ =404;
    }

    error_log /var/log/nginx/website2_error.log;
    access_log /var/log/nginx/website2_access.log;
}
Enable Server Blocks
- Create symbolic links to enable the server blocks:
sudo ln -s /etc/nginx/sites-available/website1.com /etc/nginx/sites-enabled/
sudo ln -s /etc/nginx/sites-available/website2.com /etc/nginx/sites-enabled/
- Test Nginx configuration:
sudo nginx -t
- Reload Nginx to apply the changes:
sudo systemctl reload nginx
Step 3: Test Nginx Configuration
- Create a simple
index.htmlfile for each website:
echo "<h1>Welcome to Website 1</h1>" > /var/www/website1.com/index.html
echo "<h1>Welcome to Website 2</h1>" > /var/www/website2.com/index.html
- Visit
http://website1.comandhttp://website2.comin your browser to verify the setup.
Step 4: Secure Websites with SSL/TLS
Install Certbot
Install Certbot with the Nginx plugin:
sudo apt install certbot python3-certbot-nginx -y
Obtain SSL Certificates
Run Certbot for each website:
sudo certbot --nginx -d website1.com -d www.website1.com
sudo certbot --nginx -d website2.com -d www.website2.com
Certbot will automatically configure SSL for both websites and redirect HTTP traffic to HTTPS.
References
Conclusion
Hosting multiple websites on a single Ubuntu server is a practical and cost-effective way to manage web applications or domains. Whether you’re using Apache or Nginx, the process involves setting up directories, configuring virtual hosts or server blocks, and securing your websites with SSL/TLS certificates using Certbot. By following this guide, you can efficiently host multiple domains or subdomains, ensuring your server is optimized for scalability and security.
Both Apache and Nginx are powerful web servers, and the choice between them often depends on your specific requirements. Apache provides extensive configuration options and compatibility, while Nginx excels in performance and handling concurrent connections. Whichever you choose, this guide equips you with the foundational knowledge to manage multiple websites effectively.
Stay tuned for the next topic: Managing Storage and Disks on Ubuntu Server In this upcoming guide, you’ll learn how to configure disk initializing, create partition for different file system, and expand disk including mounting to the file system. Don’t miss it!
7 thoughts on “14. Host Multiple Websites on a single Ubuntu Server: Useful tips”