Azure AI Foundry is a powerful platform that allows organizations to build and deploy AI agents tailored to their unique requirements. By leveraging Azure OpenAI resources, you can create intelligent agents equipped with advanced tools like code interpreters and custom functions. These agents can perform tasks such as running code, searching the web, and much more.
In this guide, we’ll walk you through the basic agent setup process using Azure AI Foundry. Note that Azure AI Foundry currently supports only the basic setup option.
Table of Contents
What Is Azure AI Foundry?
Azure AI Foundry is a cloud-based service designed to help users create and manage AI agents with minimal complexity. It integrates seamlessly with Azure OpenAI resources, enabling users to deploy models like GPT-4 and customize agents with specific instructions and tools.
Key features of Azure AI Foundry include:
- Customizable Agents: Tailor agents with specific instructions and tools to meet your needs.
- Model Flexibility: Deploy and use powerful AI models like GPT-4 for your agents.
- Playground for Testing: Prototype and test agents in a no-code environment before deployment.
- Tool Integration: Extend agent capabilities with tools like a code interpreter, Bing search, and more.
Whether you’re building chatbots, automating workflows, or enhancing customer interactions, Azure AI Foundry provides a user-friendly interface to create and test AI agents.
Azure AI Foundry Pricing
Azure AI Foundry is a free platform provided by Microsoft, meaning there are no direct charges for accessing or using the Azure AI Foundry portal itself. However, the costs associated with creating and deploying AI agents depend on the resources and services you use within the platform, such as AI models, tools, and compute resources.
The cost of using Azure AI Foundry is primarily driven by:
- Model Usage: Charges are based on the AI model you deploy (e.g., GPT-4) and the number of tokens processed during interactions.
- Agent Tools: Additional charges may apply for enabling tools like the code interpreter or Bing search.
- Compute Resources: The underlying Azure OpenAI resources, such as virtual machines and storage, also contribute to the cost.
How to Estimate Pricing
To estimate the cost of using Azure AI Foundry for your specific needs, you can use the Azure Pricing Calculator. This tool allows you to:
- Select the AI models and resources you plan to use.
- Estimate the usage (e.g., token processing, API calls).
- Calculate the total cost based on your configuration.
Access the Pricing Calculator
Visit the Azure Pricing Calculator and select the Azure OpenAI Service to begin estimating your costs.
Steps to Create an AI Agent Using Azure AI Foundry
Follow these steps to create your first AI agent using Azure AI Foundry:
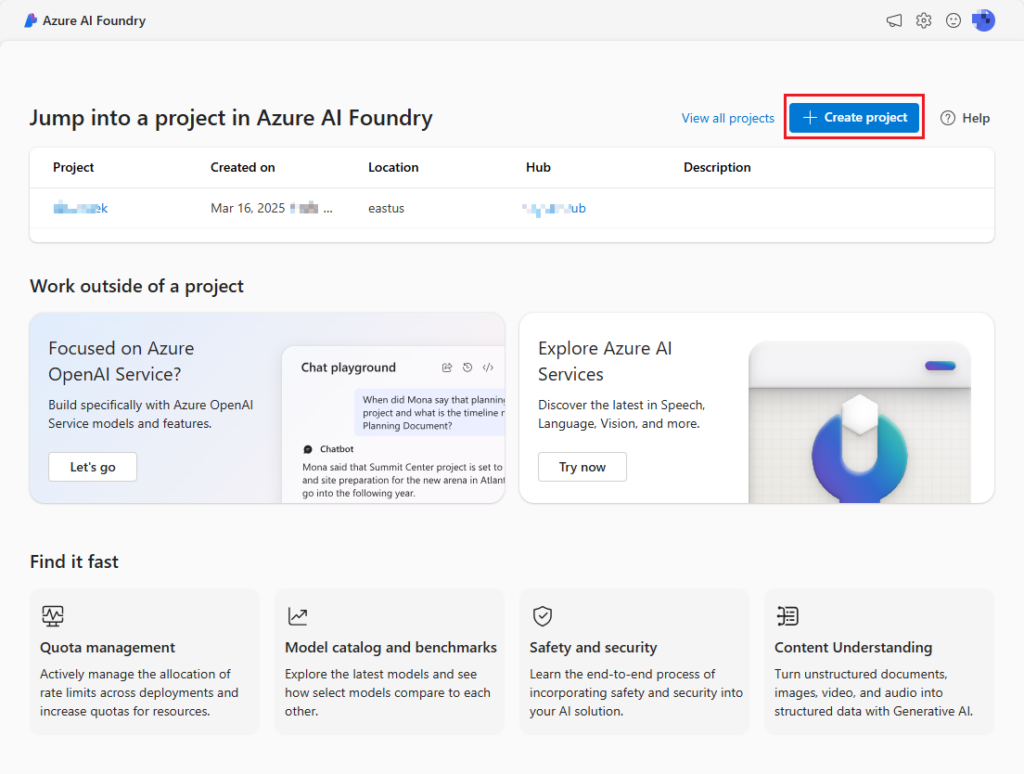
Step 1: Create a Hub and Project in Azure AI Foundry Portal
- Navigate to the Azure AI Foundry portal.
- Log in with your Azure account.
- Create a new hub and project by following the on-screen instructions.
- The hub acts as the central workspace for managing your AI resources.

- The project contains the specific configurations and models for your AI agent.

Step 2: Deploy a Model
Once your project is set up, the next step is to deploy a model for your agent to use.
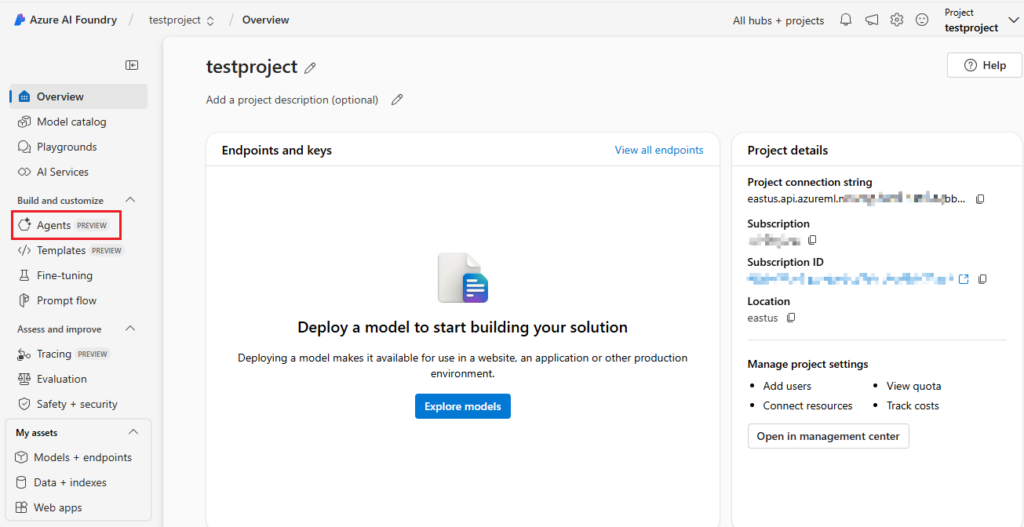
- Go to your project and click on the Agents tab.

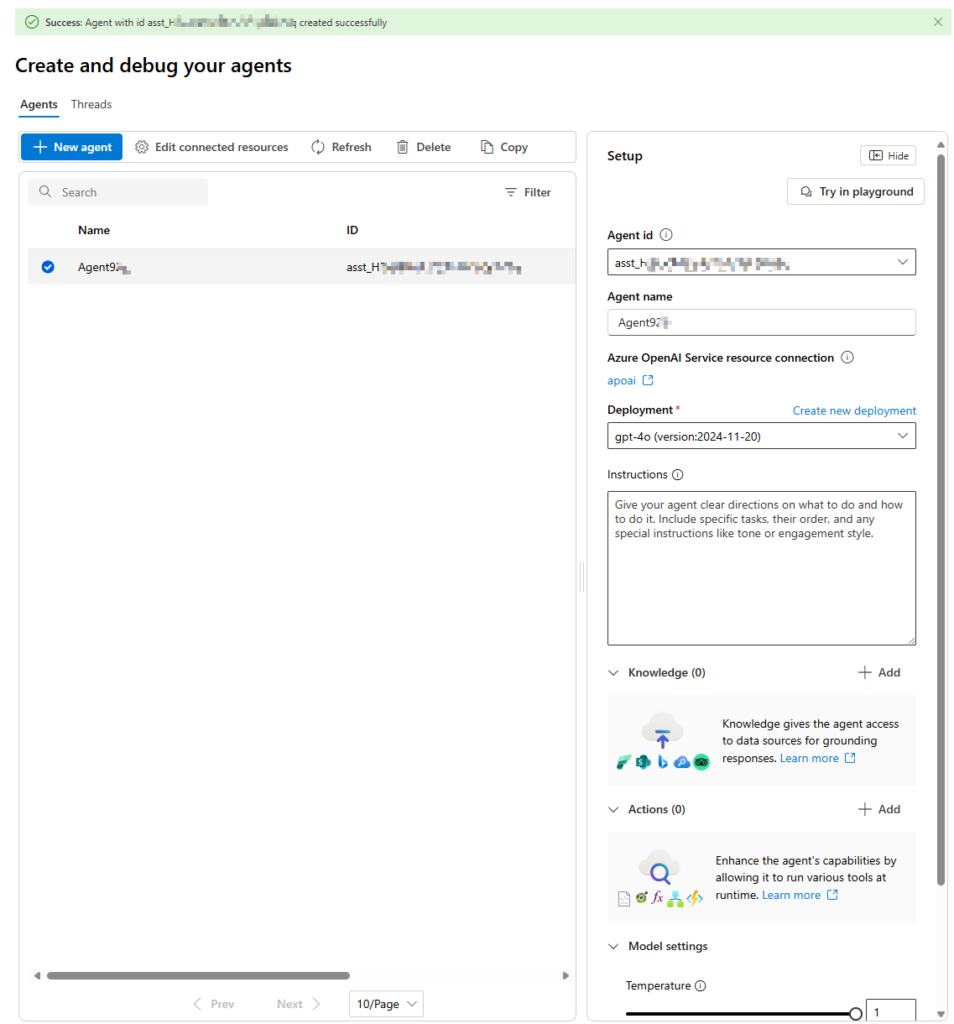
- Select your Azure OpenAI Resource.

- Choose a model deployment for your agent:
- If you already have a deployed model, select it from the list.
- If not, the platform will prompt you to deploy a new model.

- For this guide, we’ll use the GPT-4 model for our agent.

Step 3: Test the Agent in the Playground
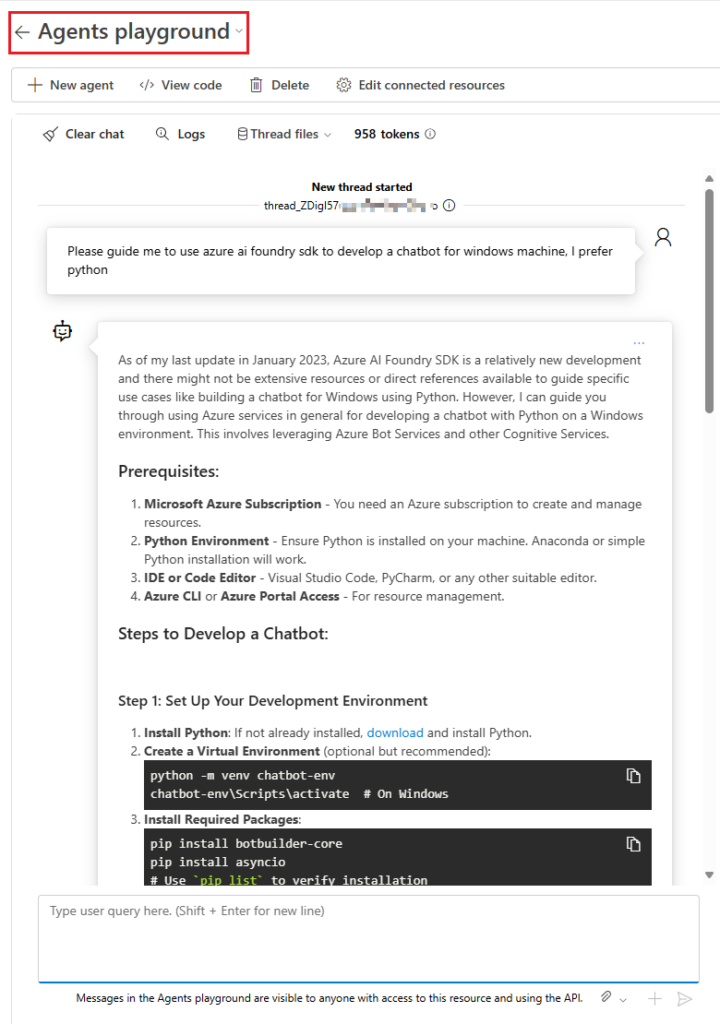
The Azure AI Foundry Playground provides a no-code environment to test and refine your agent.
- After deploying the model, navigate to the Playground section.

- Select the agent you just created. You’ll be directed to the agent configuration page.
- On the configuration page, you can:
- Add custom instructions to fine-tune the agent’s behavior.
- Enable tools like the code interpreter and Bing search to extend the agent’s capabilities.


- Test your agent by interacting with it in the Playground. This allows you to prototype and validate its functionality before deploying it for real-world use.

Congratulations! You’ve successfully created and tested an AI agent using Azure AI Foundry.
Key Features of the AI Agent
Your agent, built using Azure AI Foundry, can perform a wide range of tasks based on the tools and instructions you configure. Some of the notable features include:
- Custom Instructions: Improve the agent’s performance by providing it with specific guidelines.
- Code Interpreter: Enable the agent to execute code snippets and provide outputs.
- Web Search: Integrate Bing search to allow the agent to fetch real-time information.
By leveraging these features, you can create versatile agents tailored to your business needs.
Conclusion
Azure AI Foundry simplifies the process of creating and deploying AI agents by providing an intuitive interface and powerful tools. Whether you’re new to AI development or an experienced professional, this platform enables you to harness the power of Azure OpenAI resources to build intelligent, customizable agents.
Start building your AI agent today by visiting the Azure AI Foundry portal.
1 thought on “How to Create an AI Agent Using Azure AI Foundry”