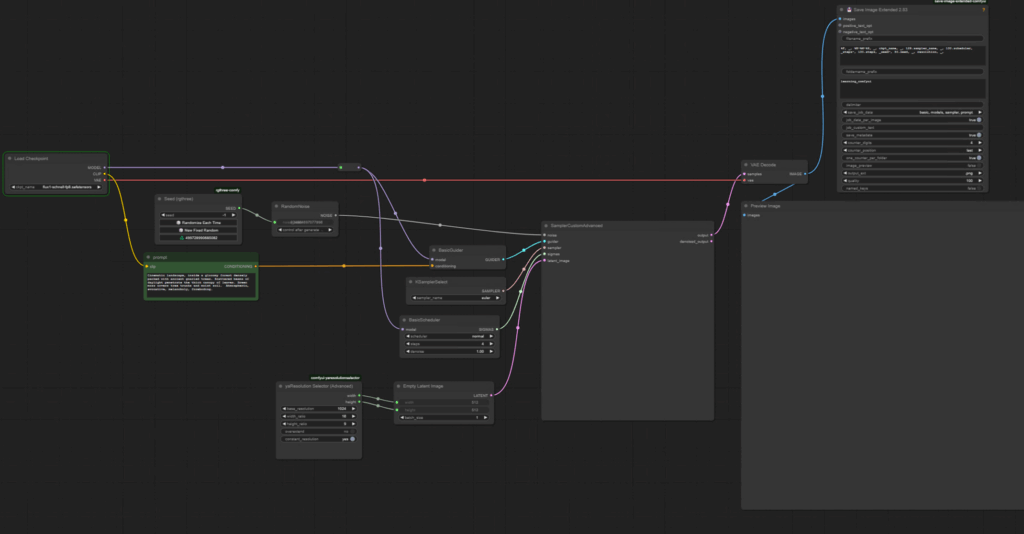
When working with machine learning workflows, modular sampling can provide a more intuitive and flexible approach to constructing models. In the previous article, I showed you how to set up the Flux model using a standard case sampler node. In this guide, we’ll explore how to set up a modular workflow using the SamplerCustomAdvanced node, focusing on its inputs and connections to achieve the same results as a standard case sampler node. This workflow is particularly useful for models like Flux1 Schnell, which do not support negative prompts or require a CFG scale.

Table of Contents
Why Modular Sampling?
Modular sampling allows you to break down the sampling process into smaller, manageable nodes, making it easier to customize and debug workflows. Unlike workflows that depend on negative prompts or CFG scales, modular sampling relies on individual nodes for noise generation, guidance, and scheduling, giving you greater control over the sampling process.
Setting Up the Workflow
Below is a step-by-step guide to setting up a modular workflow using SamplerCustomAdvanced.
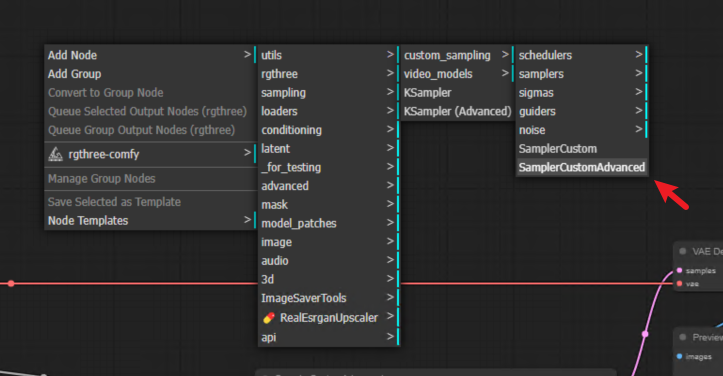
1. Adding the SamplerCustomAdvanced Node
- Start by adding the SamplerCustomAdvanced node to your workflow. This node serves as the central hub for modular sampling.
- To locate it, double-click and type
S-A-M-Pin the search bar.
2. Connecting the Latent Image
- Plug an empty latent image (with its resolution set) into the latent image input of SamplerCustomAdvanced.
3. Noise Generation
- RandomNoise Node: Add the RandomNoise node to generate a noise pattern for the sampling process.
- Connect the output of RandomNoise to the noise input of SamplerCustomAdvanced.
- Noise Seed Input: Use an RG3 seed node to supply a noise seed. Convert the noise seed widget to an input and connect the RG3 seed node.
4. Guidance Input
- BasicGuider Node: Add the BasicGuider node to convert conditioning into guidance for the sampler.
- Connect the guider output of BasicGuider to the guider input of SamplerCustomAdvanced.
- Diffusion Model: The BasicGuider node requires input from the diffusion model (e.g., Flux1 Schnell FP8). Connect the diffusion model to the BasicGuider input.
5. Sampler Input
- KSamplerSelect Node: Add the KSamplerSelect node to supply the sampler input for SamplerCustomAdvanced.
- Set the sampler to the default value of
euler.
6. Sigmas Input
- BasicScheduler Node: Add the BasicScheduler node to handle the sigmas input, which controls the noise distribution during the diffusion process.
- Connect the sigmas output of BasicScheduler to the sigmas input of SamplerCustomAdvanced.
- Connect the diffusion model to the BasicScheduler input.
7. Output Configuration
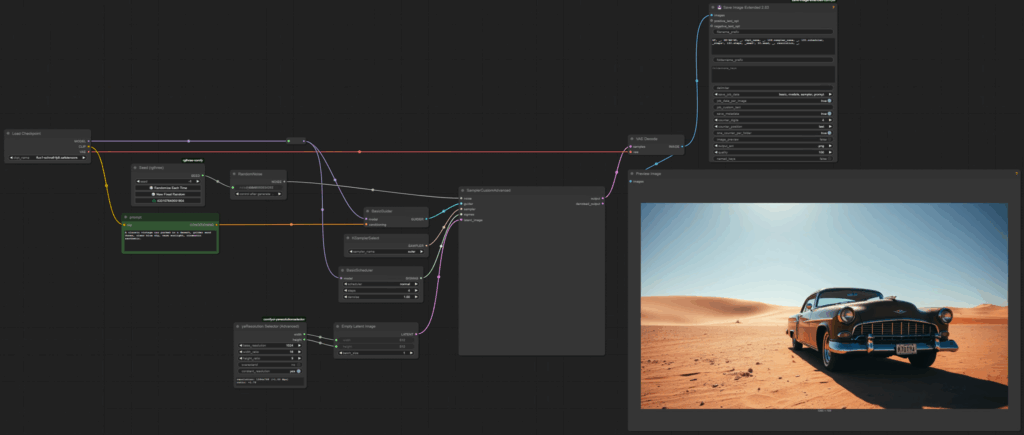
- Connect the output of SamplerCustomAdvanced to the VAE Decode samples input.
- Update the metadata in the Save Image Extended node by plugging in the badge ID numbers for the sampler and scheduler nodes. For example:
- Sampler ID:
129 - Scheduler ID:
130
- Sampler ID:
Key Parameters for Flux1 Schnell
When working with the Flux1 Schnell model, keep these considerations in mind:
- Steps: Set the number of steps to
4, as higher values will not improve the quality due to the distilled nature of the model. - Seed: Ensure the same seed is used for consistent results.
- Prompt: Use the same prompt across different workflows to compare outputs effectively.
Example Workflow
Benefits of Modular Sampling
- Flexibility: Easily swap out nodes for different models or configurations.
- Debugging: Pinpoint issues by isolating individual nodes.
- Customization: Fine-tune parameters like noise patterns, guidance, and scheduling independently.