Introduction
Latent upscaling is an advanced image enhancement technique that operates within the latent space of stable diffusion models. By processing the image in its compact latent representation, this method allows for significant resolution upgrades and improved detail quality. Unlike traditional pixel-based upscaling, latent upscaling introduces new levels of detail during the rediffusion process, making it a preferred choice for generating high-resolution, realistic images. In this guide, we’ll explore how to use latent upscaling effectively to refine your images and achieve professional-grade results.
Table of Contents
What Is Latent Upscaling?
Latent upscaling works by manipulating the latent representation of an image before it is decoded into pixel space by the Variational Autoencoder (VAE). The latent space is a compressed version of the image, akin to a small blueprint, that stable diffusion uses during the generation process. By upscaling in this space, you can achieve sharper and more detailed results when the image is converted back to pixel space.
Why Use Latent Upscaling?
- Sharper Details
Latent upscaling enhances textures, edges, and intricate details that are often lost with standard upscaling methods. - Higher Resolutions
This technique allows you to scale images to significantly larger dimensions while maintaining quality. - Efficient Workflow Integration
Latent upscaling integrates seamlessly into stable diffusion workflows, making it accessible to users familiar with sampler nodes and resolution settings. - Dynamic Rediffusion
Unlike simple resizing, latent upscaling rediffuses the image, adding new details and improving realism.
Step-by-Step Guide: How to Perform Latent Upscaling
1. Set Up Your Workflow
Start with a text-to-image workflow using a stable diffusion model such as Juggernaut XL Juggernaut XL – Jugg_XI_by_RunDiffusion | Stable Diffusion XL Checkpoint | Civitai. Ensure the initial resolution is set to a manageable size, such as 1024×1024, to avoid overloading your system.
2. Add the Latent Upscale Node
- Insert an “Upscale Latent” node into your workflow.
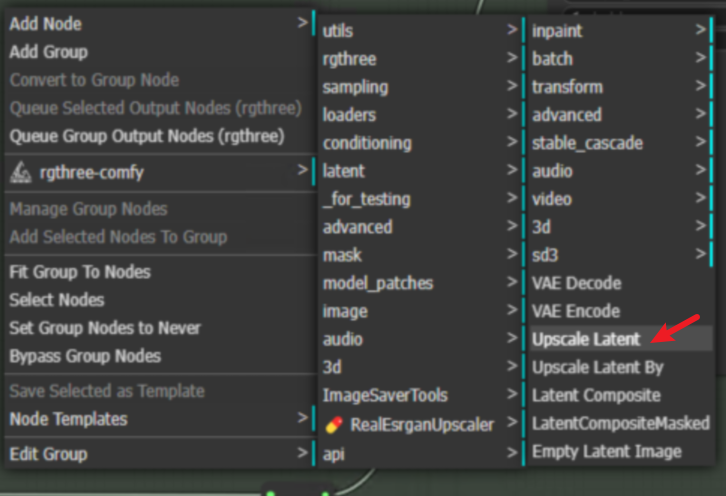
- Connect the output of the original sampler node to the input of the upscale latent node.
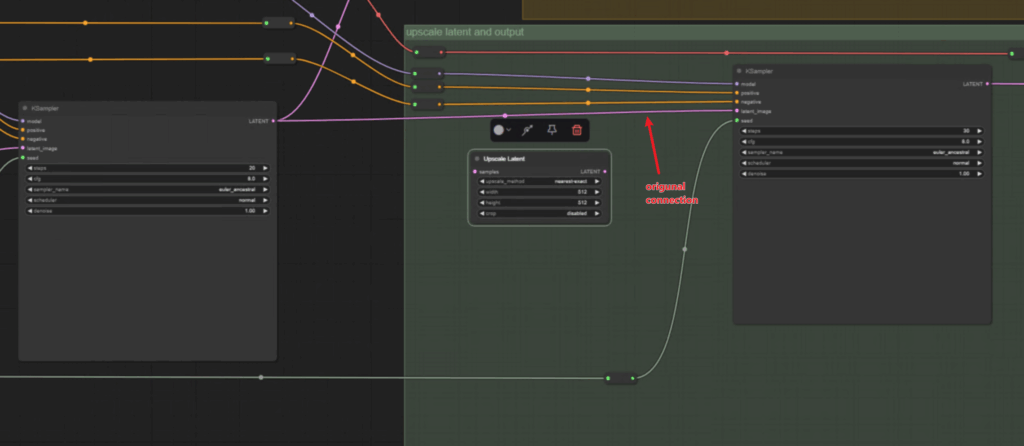
- Route the output of the upscale latent node to a second sampler node.
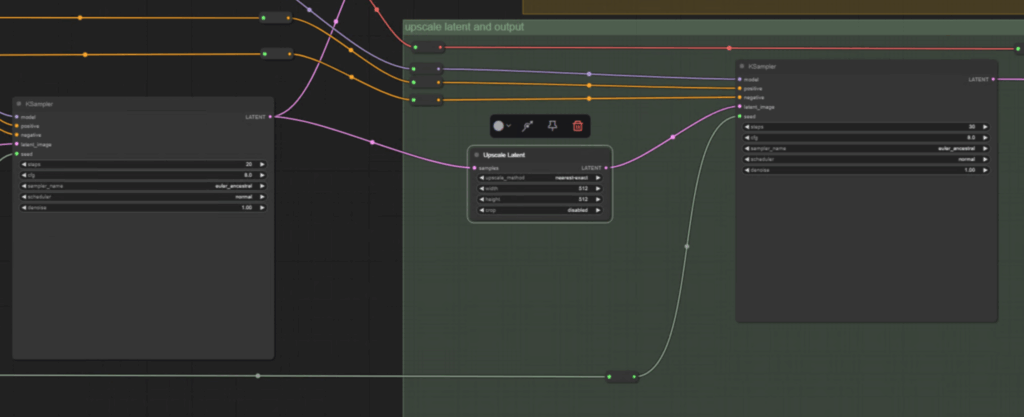
3. Adjust Resolution and Aspect Ratio
- Define the target resolution by doubling the width and height of the original resolution. For example, if your base resolution is 1024×576 with a 16:9 aspect ratio, upscale it to 2048×1152.
- Use a resolution selector node for precise aspect ratio management.
4. Set the Denoise Value
- Configure the denoise strength in the second sampler node. A value of around 0.55 works well for most scenarios.
- Lower denoise values retain more of the original structure, while higher values introduce more variation and detail.
5. Execute the Workflow
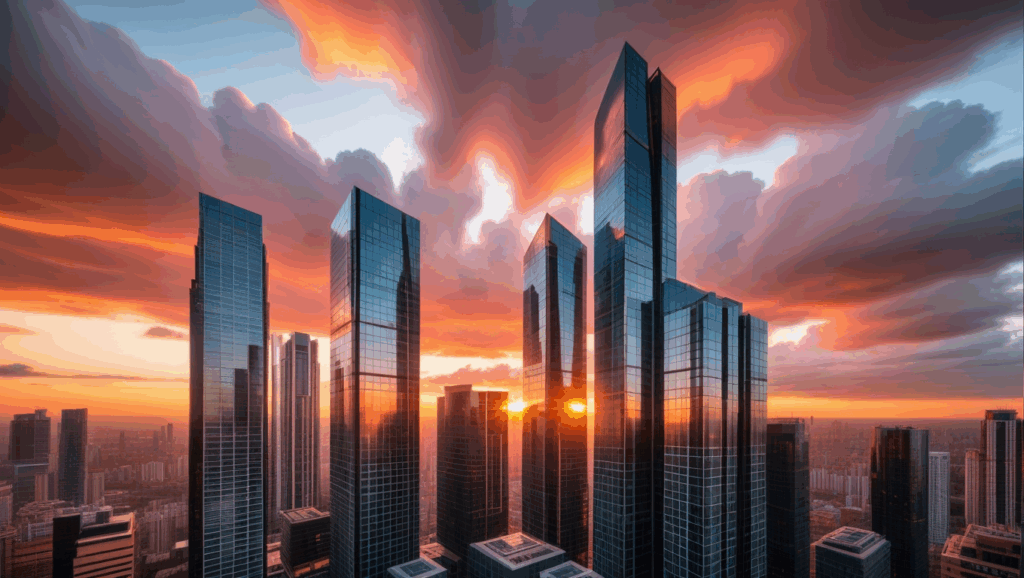
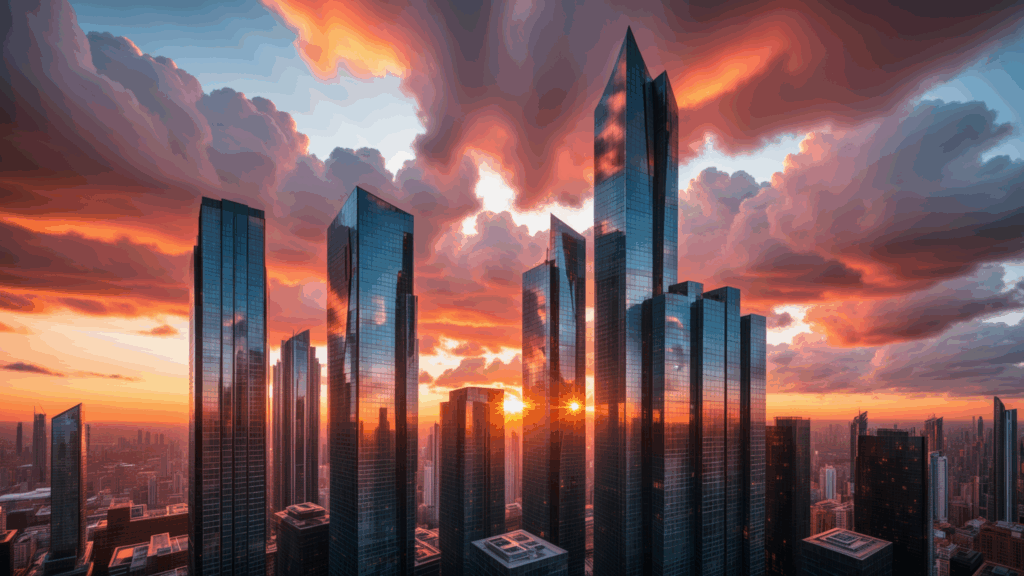
- Prompt: “Professional architectural photography, urban skyline, sunset glow, modern skyscrapers, contemporary design, reflective glass facades, dynamic cloud formations, cinematic lighting, wide-angle perspective.“
- Queue the workflow to start processing.
- Be prepared for longer processing times and higher GPU memory usage when working with higher resolutions.
6. Review the Results
- Compare the original image with the upscaled version to evaluate the improvements.
- Check for enhanced details, such as textures, lighting, and overall sharpness.
Before upscaling:
After upscaling:
Practical Example: Enhancing a Landscape Image
Imagine generating a landscape image of a forest at sunrise using Juggernaut XL at a resolution of 1024×576. While the base image captures the overall scene, details in the trees and sunlight appear slightly blurred. By applying latent upscaling with a target resolution of 2048×1152, the fine details of the leaves, bark, and light rays become more pronounced, creating a more immersive and realistic final image.
Best Practices for Latent Upscaling
- Optimize GPU Resources
Higher resolutions require more GPU memory. Monitor your system’s resource usage to avoid crashes. - Experiment with Denoise Levels
Adjust the denoise value to find the perfect balance between preserving the original image and introducing new details. - Maintain Aspect Ratios
Always upscale with consistent aspect ratios to prevent distortion in the final image. - Save Iterative Outputs
Save both the original and upscaled versions for comparison and future reference.
Key Advantages Over Traditional Upscaling
Latent upscaling differs from traditional methods, such as bicubic or nearest-neighbor interpolation, by generating new details during the rediffusion process. Instead of merely enlarging the image, latent upscaling enhances textures, lighting, and other fine details, resulting in a more polished and professional output.
Conclusion
Latent upscaling is a game-changing technique for anyone working with stable diffusion models. By leveraging the latent space, you can achieve higher resolutions and sharper details without resorting to traditional interpolation methods. Whether you’re creating digital art or enhancing visuals for professional projects, latent upscaling offers a powerful and efficient solution.