ComfyUI is a powerful node-based interface designed for building AI workflows. Whether you’re a beginner or an experienced user, understanding its layout and functionality is essential for efficient workflow creation. This guide will help you navigate the interface, master essential operations, and begin building workflows with confidence.
Table of Contents
- Overview of the ComfyUI Interface
- Essential Mouse and Keyboard Operations
- Adding and Managing Nodes
- Using the Preview Window
- Customizing the Interface
- Tips for Efficient Navigation
- Troubleshooting Common Issues
- Practice Exercise: Build a Simple Workflow
- Conclusion
Overview of the ComfyUI Interface
When you launch ComfyUI, you’ll see a clean, intuitive interface divided into several sections. Let’s break down the key components:
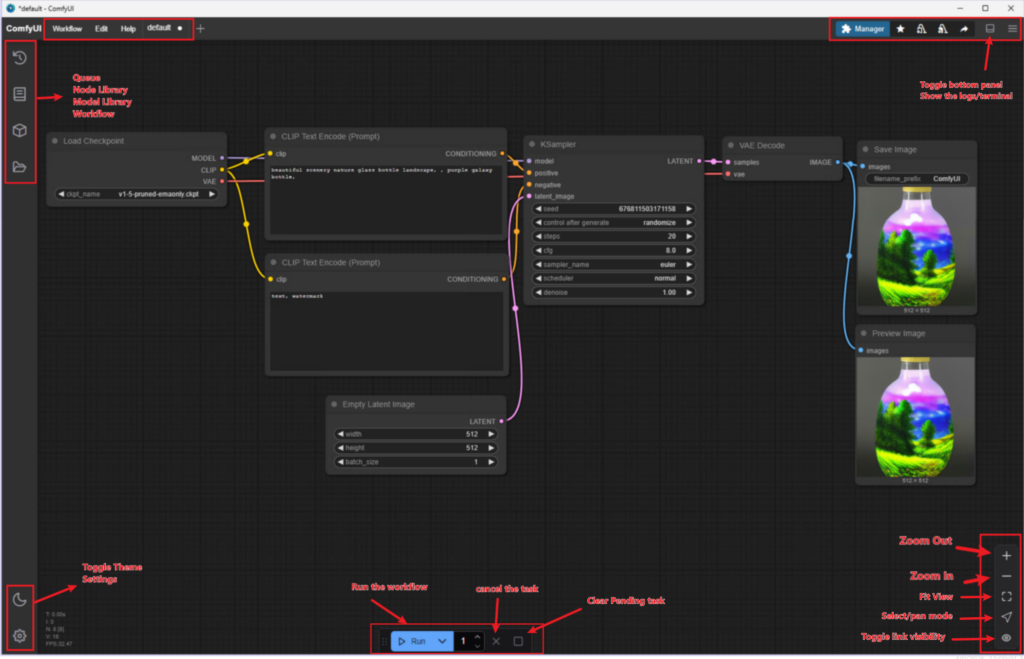
Main Sections of the Interface
Node Editor (Canvas)
- The central workspace where you build workflows by connecting nodes.
- Nodes represent individual operations or processes, and connections between them define the flow of data.
Toolbar (Top Menu)
- Provides options for saving, loading, and exporting workflows.
- Includes basic controls like undo/redo, zoom, and access to the ComfyUI Manager.
Preview Window (Right Panel)
- Displays real-time previews of workflow outputs, such as images or processed results.
- Useful for visualizing intermediate or final results.
Settings Panel (Left Panel)
- Contains configuration options for selected nodes.
- Allows fine-tuning of parameters and settings for workflows.
Status Bar (Bottom)
- Displays system information such as GPU usage, VRAM, and processing status.
- Includes quick access buttons for zoom, panning, and toggling wire visibility.
Essential Mouse and Keyboard Operations
Efficiency in ComfyUI comes from mastering core mouse and keyboard operations. Here’s a quick rundown:
Mouse Operations
- Left-Click: Select nodes or areas on the canvas.
- Right-Click: Open the node menu to add new nodes or access node-specific options.
- Middle-Click (or Mouse Wheel): Drag to pan the canvas; scroll to zoom in/out.
- Drag and Drop: Move nodes around the canvas or connect nodes by dragging from output ports to input ports.
Keyboard Shortcuts
- Ctrl + Z / Ctrl + Y: Undo/Redo actions.
- Ctrl + S: Save the current workflow.
- Ctrl + O: Open a saved workflow.
- Ctrl + Shift + S: Save the workflow as a new file.
- Delete / Backspace: Delete selected nodes.
- Ctrl + Mouse Wheel: Zoom in/out on the canvas.
- Spacebar: Center the canvas on your workflow.
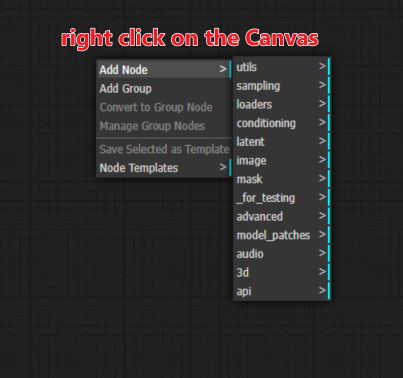
Adding and Managing Nodes
Nodes are the building blocks of workflows in ComfyUI. Here’s how to add, connect, and manage them effectively:
Adding Nodes
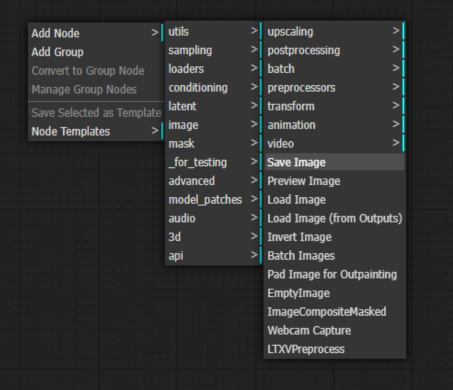
- Right-Click on the Canvas:
Open the node menu to browse categories (e.g., Input, Processing, Output) and select a node.
Use the search bar at the top of the menu for quick access.
Connecting Nodes
- Drag from Output to Input:
Click and drag from the output port of one node to the input port of another. Ensure data types match (e.g., image-to-image, text-to-text).
Disconnecting Nodes
- Right-Click on a Connection Line:
Delete the connection between two nodes.
Repositioning Nodes
- Click and Drag:
Move nodes around the canvas to organize your workflow.
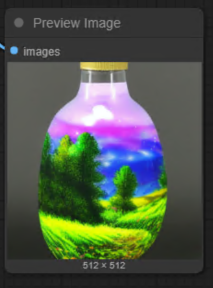
Using the Preview Window
The Preview Window is where you see the outputs of your workflows. Here’s how to make the most of it:
- Preview Outputs:
Click on an output node (e.g., Preview Image) to view its result in the Preview Window.
- Zooming:
Use the mouse wheel to zoom in/out on the previewed image. - Saving Outputs:
Right-click on the previewed image to save it to your computer.
Customizing the Interface
ComfyUI offers customization options to enhance your workflow experience:
Adjusting the Canvas View
- Zoom In/Out: Use the mouse wheel or Ctrl + Mouse Wheel.
- Pan the Canvas: Hold the middle mouse button (or spacebar) and drag to move the canvas.
Organizing Nodes
- Align Nodes: Manually drag nodes into clean rows or columns for better organization.
- Group Nodes: Use colored backgrounds or labels (if supported) to visually group related nodes.
Tips for Efficient Navigation
- Use Shortcuts: Memorize common shortcuts like Ctrl + Z and Ctrl + S for faster workflow management.
- Organize Your Canvas: Keep input, processing, and output nodes in separate areas for better readability.
- Save Frequently: Use Ctrl + S often to save your progress and prevent data loss.
- Experiment with Zoom Levels: Zoom in for detailed node editing and zoom out for an overview of your workflow.
Troubleshooting Common Issues
Nodes Not Connecting
- Ensure the output type of one node matches the input type of the next. For example, an image output cannot connect to a text input.
Canvas Feels Cluttered
- Use zoom and pan features to organize your workspace. Delete unnecessary nodes or connections.
Preview Not Updating
- Check if all necessary nodes are connected and configured correctly. Some nodes require specific inputs to function.
Practice Exercise: Build a Simple Workflow
Follow these steps to create a basic workflow:
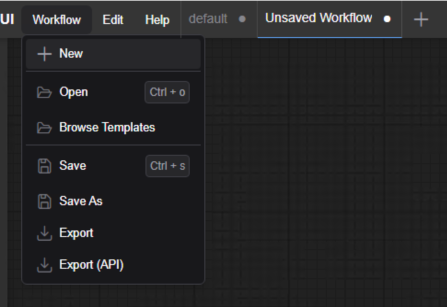
Clear Default node or New a workflow.
You can go to the Edit -> Clear Workflow to clear the default workflow.

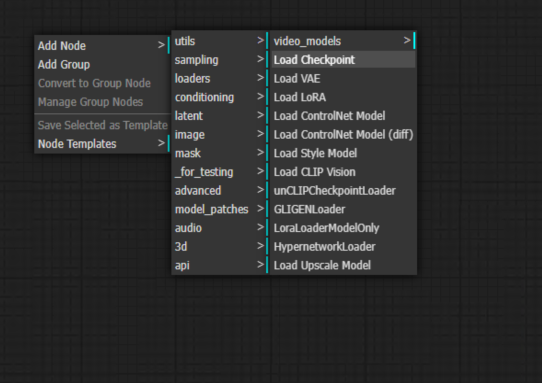
Add Input Node:
Right-click on the canvas, go to the Input category, and add load checkpoint node.
Add KSampler Node:
The second node you’ll need is the KSampler. Right click and Navigate to:
Add Node > sampling > KSampler
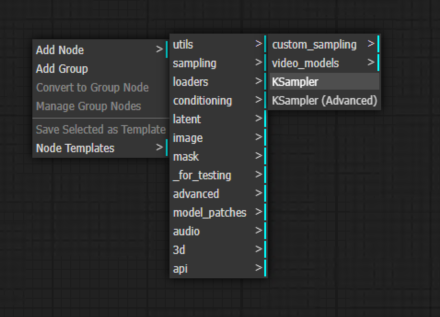
The KSampler is the workhorse of the generation process.

It takes random image noise then tries to find a coherent image in the noise. This is called “sampling.” It makes that image slightly less noisy based on what it thinks it sees, then looks at it again. Rinse and repeat as many times as you tell it to.
It’s like if you were trying to imagine a shape in a randomly cut lump of clay. Then you sculpt the shape of that clay a teensy bit to look more like what you see in it. You keep sculpting a little bit at a time until you can convince your friend to see the same thing you do.
Node Connection:
On the right side of every node is that node’s output. The left side of every node is the input. Let’s help the KSampler’s imagination by connecting the MODEL output dot on the right side of the Load Checkpoint node to the model input dot on the KSampler node with a simple mouse drag motion.
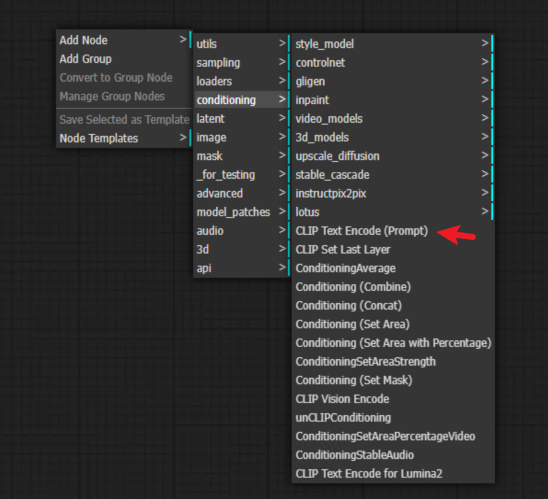
CLIP Text Encode (Positive Prompt)
Out of all the things the KSampler now knows how to imagine, how do you tell it what you want it to imagine? This is the text prompt’s job.Right click on any empty space and navigate to: Add Node > Conditioning > CLIP Text Encode (Prompt)
CLIP is another kind of dictionary which is embedded into our SDXL file and works like a translation dictionary between English and the language the AI understands. The AI doesn’t speak in words, it speaks in “tokens,” or meaningful bundles of words and numbers that map to the concepts the model file has its giant dictionary.
Take the CLIP output dot from the Load Checkpoint node and connect it to the clip input dot. Then connect the conditioning dots from the output of the CLIP Text Encode (Prompt) node to the positive input dot of the KSampler node.
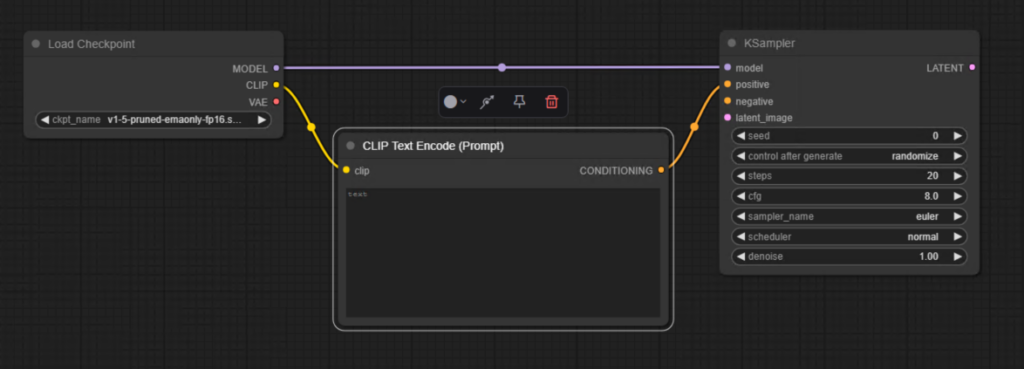
This sends CLIP into your prompt box to eat up the words, convert them to tokens, and then spit out a “conditioning” for the KSampler. Conditioning is the term used when you coax the KSampler into looking for specific things in the random noise it starts with. It’s using your English-to-token translated prompt to guide its imagination.
CLIP Text Encode (Negative Prompt)
Conditioning goes both ways. You can tell the KSampler to look for something specific and simultaneously tell it to avoid something specific. That’s the difference between the positive and negative prompts.
You’ll need a second CLIP Text Encode (Prompt) node for your negative prompt, so right click an empty space and navigate again to:
Add Node > Conditioning > CLIP Text Encode (Prompt)
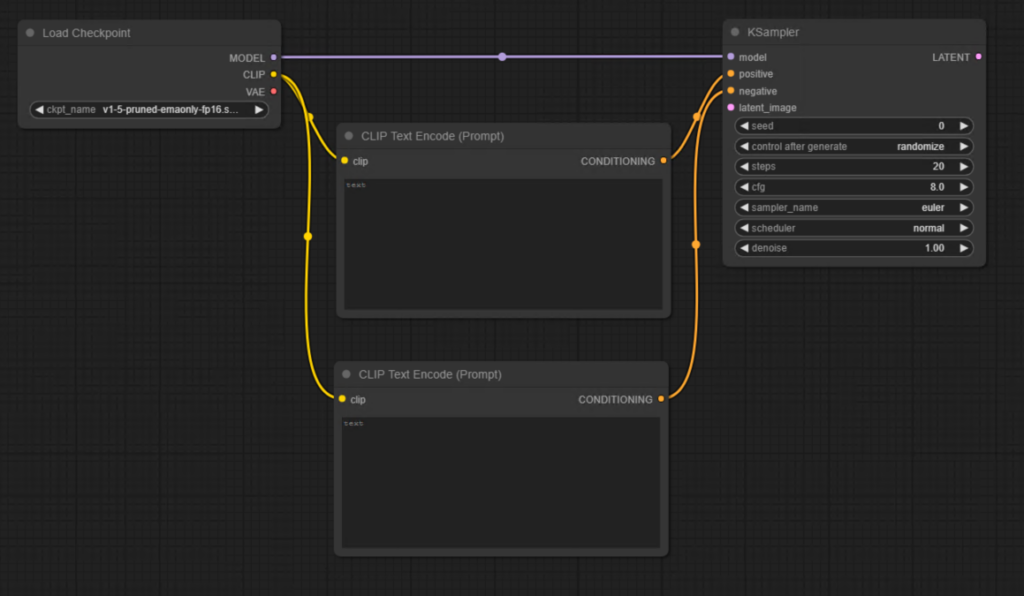
Connect the CLIP output dot from the Load Checkpoint again. Link up the CONDITIONING output dot to the negative input dot on the KSampler.
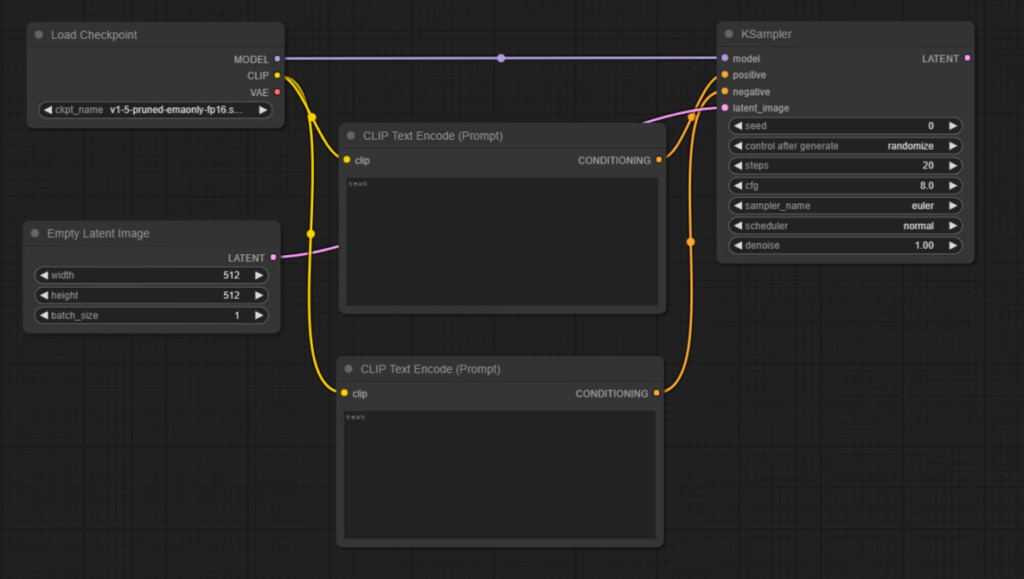
Empty Latent Image
Now we have to explicitly give the KSampler a place to start by giving it an “empty latent image.” An empty latent image is like a blank sheet of drawing paper. We give a blank sheet of paper to the KSampler so it has a place to draw the thing we tell it to draw.
Right click any empty space and select:
Add Node > latent > Empty Latent Image.
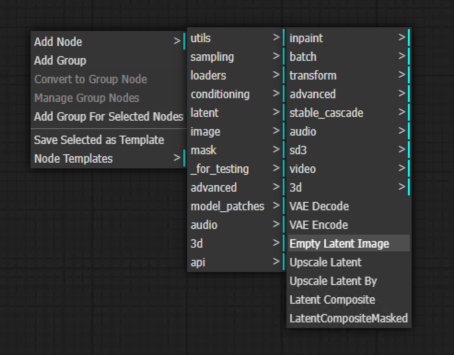
Connect the LATENT dot to the latent_image input on the KSampler.
Vae Decode
The empty latent image contains so many mathematical layers and dimensions that we humans can’t see it the way we can see a normal sheet of paper or digital image. The multifaceted latent image has to be collapsed into something much simpler. We must “decode” it down to a grid of square pixels to display on our modest, two-dimensional screens. This is done by a “VAE” (Variational Auto Encoder), which is also conveniently embedded into the SDXL model.
Add the VAE Decode node by right clicking and navigating to:
Add Node > latent > VAE Decode.
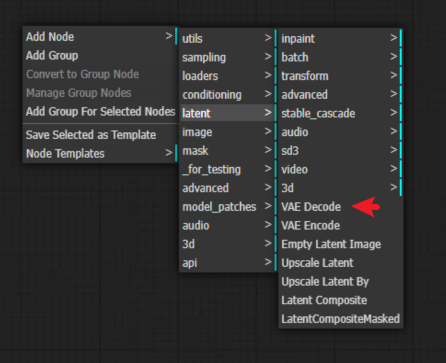
In order for the VAE Decode node to do its job collapsing the KSampler’s image into a human-visible PNG, it needs two things: The drawing the KSampler made on the empty latent image and a VAE to know exactly how to translate that drawing back into pixels.
Connect the KSampler’s LATENT output to the samples input on the VAE Decode node. Then look all the way back at the Load Checkpoint node and connect the VAE output to the vae input.

Save the image
We just need one more very simple node and we’re done. We need a node to save the image to the computer! Right click an empty space and select:
Add Node > image > Save Image.
Then connect the VAE Decode node’s output to the Save Image node’s input.
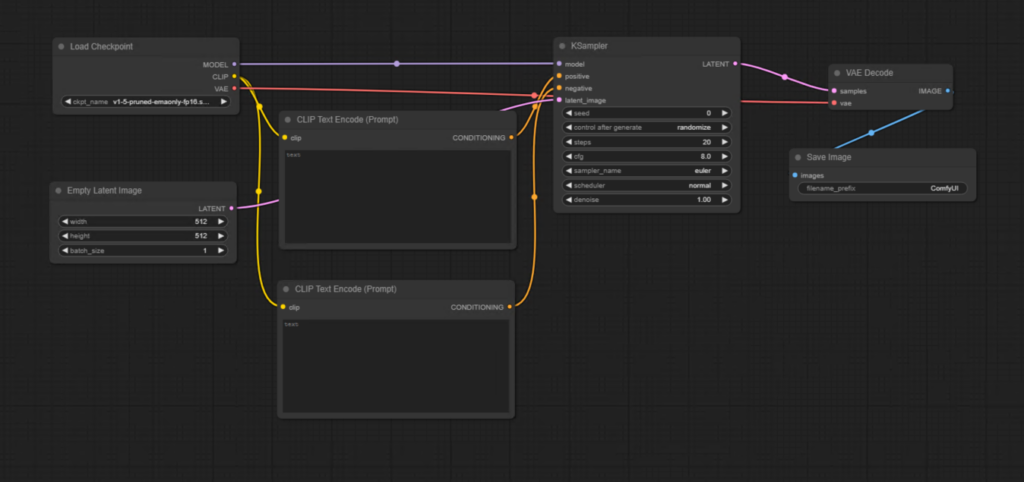
The Workflow
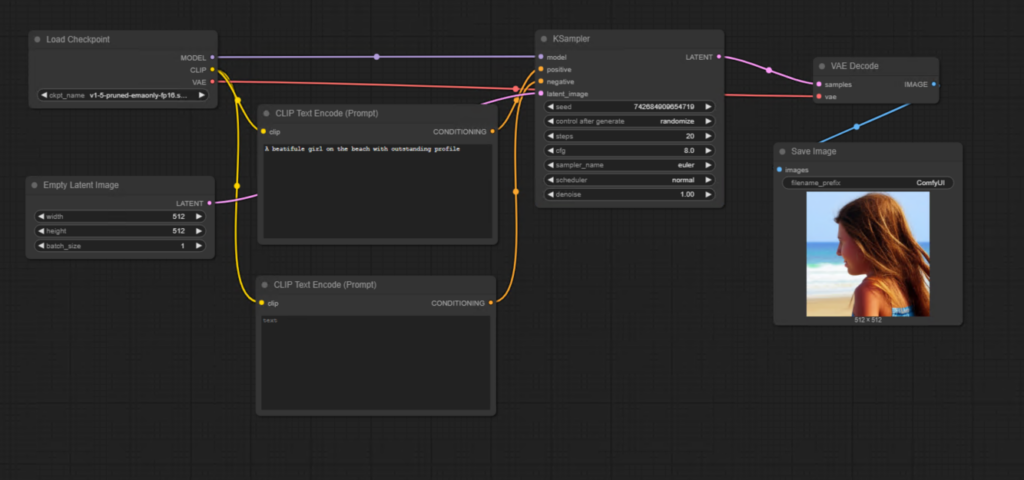
Every node on the workspace has its inputs and outputs connected. Our workflow is complete! There’s nothing left to do but try it out. Type something into the CLIP Text Encode text box that’s attached to the “positive” input on the KSampler.
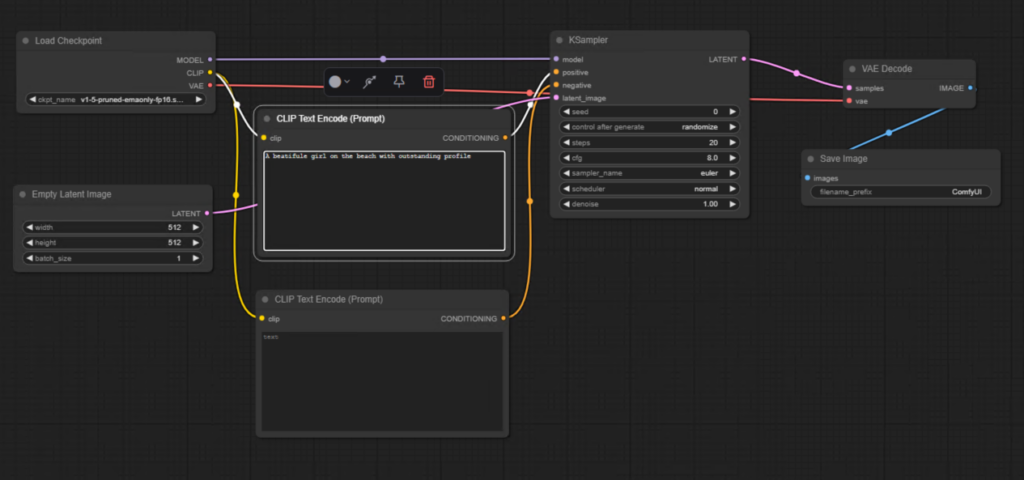
Now click Queue Prompt on the right.
That’s it… That’s the whole thing! Every text-to-image workflow ever is just an expansion or variation of these seven nodes!
Conclusion
By now, you should have a solid understanding of the ComfyUI interface, essential shortcuts, and basic operations. With these skills, you can start building workflows confidently. In the next article, we’ll dive deeper into working with nodes and explore how to create more complex workflows.